Table of Contents
Introduction
Nowadays, as the work from home culture is on the rise, building a PC will be a great option for many of you out there. But most of us don’t know, how to build a PC. Today we solve that problem, by bringing to you our in-depth beginner’s guide on “How to Build a PC?”
Building a PC by yourself or use is one of the best ways to get the best PC hardware for your budget. You might think it’s challenging and too risky, but it’s just the other way round. The truth is that anyone can build a PC. Moreover, you don’t need additional tools to build it except for a screwdriver.
If you don’t know how to build a PC then don’t worry, we have you covered. Here we will be discussing everything detail you need to consider to build a PC and how to build it as well with utmost detail so that you can build your very first PC with ease.
Why should you build a PC?
If you have a limited budget and are planning to get a PC and are confused about whether to build or buy a PC, we recommend you building your PC instead of buying it. You can make an exception if you don’t have time to build your PC. The reasons why you should build a PC are listed below:
- You can build a PC at a much lower price when compared to buying the same PC with the same specs.
- Building a PC is very simple; anyone can do it and thus save some money by not going for a pre-built PC.
- You can customise your PC the way you want it.
- You will learn the technicalities of a PC while building it.
If you are confused if you want to get a laptop or a PC, then the most important question one must ask is whether you are planning to use it outdoors. If the answer is yes, then you need a laptop. And if you don’t, then building a PC is your best bet since you can get much better specs for a lesser price compared to a laptop. Moreover, you can upgrade it down the line and customise it to your liking.
Parts required for PC Build
CPU: CPU stands for Central Processing Unit and is the primary component of a computer. It is responsible for the operating system of all programs on your PC. The CPU is where all the calculations take place, hence for all computing tasks; the CPU is an essential element of a PC.
Motherboard: It is a printed circuit board which is responsible for allocating power and allowing communication between the CPU, RAM, and all the other components of your PC.
RAM: RAM or Random-Access Memory is high-speed memory where the operating system, programs, and all currently used data are kept for quick access for the CPU.
SSD/HDD: It is the storage of your PC. SSDs are a lot faster, but HDDs get you more storage for cheaper.
PSU: PSU or power supply unit is responsible for converting AC from the wall to DC currents for the PC components.
GPU: GPU or Graphics Processing Unit is a specialized processor responsible for the graphics to be displayed on your display. It is essential for gaming since it allows for the fastest graphics processing and provides good FPS in games.
Cabinet: It is the case with which you assemble your components and build your PC
Factors to consider before buying your PC parts
Compatibility of Components: This is one of the most important points. Before buying all the components, make sure they are compatible with each other.
- The CPU and the motherboard should be compatible with each other like Ryzen 3000 CPUs are compatible with B450, X470, A520, B550, and X570 motherboards.
- RAM needs to be compatible as well, for example, you need DDR4 RAM for most of the modern CPUs, DDR3 won’t work.
- If you are using M.2 SSDs, you need to check whether your motherboard has an M.2 slot or not.
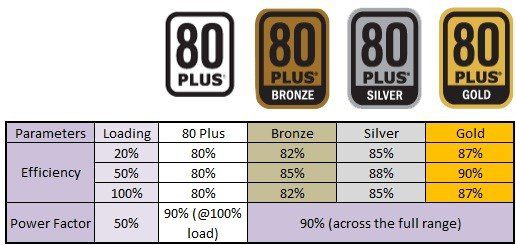
- Check whether your PSU can deliver enough power to run your PC as well. Most graphics cards have a recommended power supply wattage listed on their websites; you can check it from there as well. We recommend getting an 80+ certified PSU as the bare minimum for any wattage of PSU.
- See whether your CPU cooler has enough clearance to fit into the case. Just look at the height of the Coolers supported on the cabinet description page. If your cooler is supported, then you are good to go.
- Make sure you have enough fan headers present on your motherboard to connect all your fans. If you don’t, you can use fan header splitters or fan controllers available in the market.
Guide| How to choose the best PC parts
To build a balanced PC at a particular price point, you need to allocate specific parts of your budget. The recommended budget allocation for your specific PC parts is given below:
GPU: If you are building a gaming PC, the GPU is the most important part. Thus you would want to spend the maximum amount of your budget on it. Depending on your budget and your performance requirements, you allocate 35-50% of your budget for your GPU. Of course, those of you who are not going to get a dedicated GPU for your system don’t need to spend on a GPU but do make sure that your CPU has an integrated at first.
If you want to know about best CPUs in the market at different prices right now: Read | Best Graphics Cards in India
CPU: Depending upon your workflow, you should spend around 20-30% on your CPU. If you don’t need a discrete GPU, then you can spend more on your CPU as well. But do remember to check whether your CPU has integrated graphics or not.
If you want to know about best CPUs for different budgets in the market right now Read | Best Processors in India 2020
If you don’t know what parts to get for your PC, don’t worry we have you covered check out our different PC builds.
Best Budget PC build under ₹15,000
Best PC Build under Rs 40,000 in India
Best No-Compromise Gaming and Productivity PC Build Under ₹60,000
Best Streaming/Workstation PC build under ₹1 Lakh
Tools required to build a PC
To build a PC you don’t need a lot of things other than the PC parts. You would need the following items:
Screwdriver: The only thing you need to build a PC is a Philips head screwdriver, to screw all the screws in the motherboard
Zip Ties and Velcro Straps (Optional): These are completely optional but one can you these to manage your cables to make your PC look nice and clean.
Manuals (included in the boxes): You will require to consult your case and motherboard manual to figure out the placement of several connectors and slot so keep the manuals with you.
Ultimate Guide on How to build a PC
Let’s start building the PC without wasting any further time.
Step 1: Installing the CPU
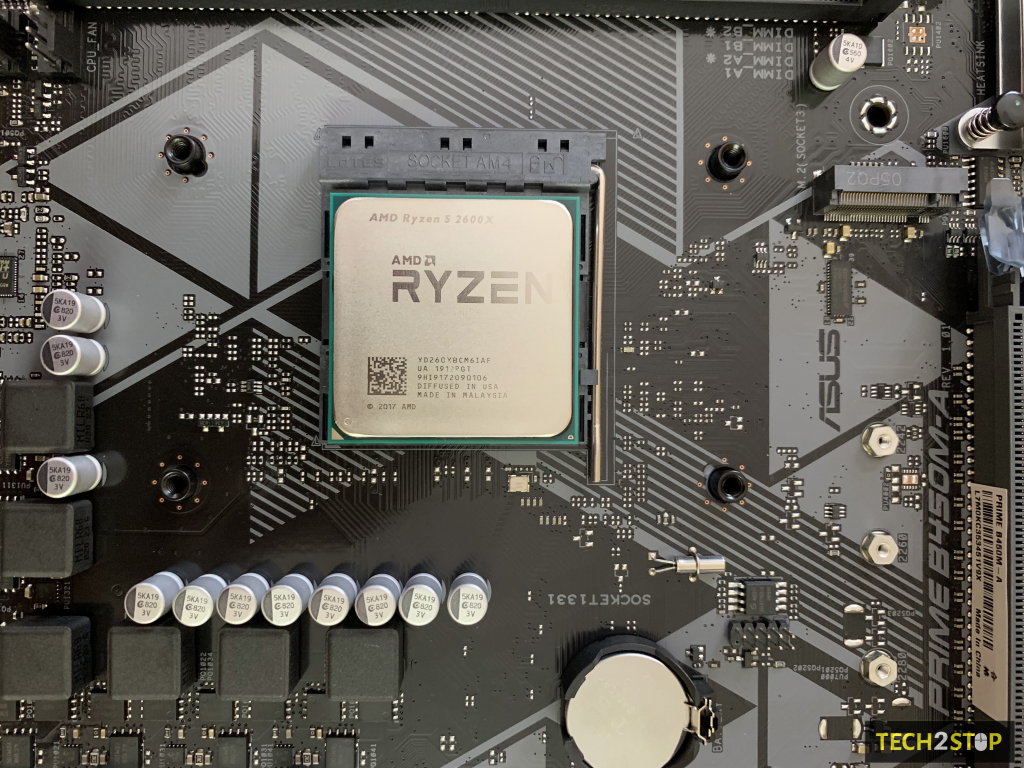
First and foremost, unbox the motherboard out of its bob and keep it on the top of the motherboard box. Then take out the other accessories included with it. It would include the motherboard IO shield along with the motherboard manual which is going to come in real handy later on.
Keeping the motherboard on the top of the motherboard box provides an anti-static surface for you to work. If you have any other anti-static surface (like an anti-static mat etc.), you can use that as well.
Next, get the CPU out of the box and make sure to be gentle with it. Hold the CPU on its sides, don’t touch the contact pins underneath the CPU since they are very fragile. Also, try not to touch the top side of the IHS (Integrated Heat Spreader) of the CPU even if you do make sure to clean the IHS of the CPU since it might leave fingerprints because of which thermal conductivity is reduced and lead to higher thermals on your PC.
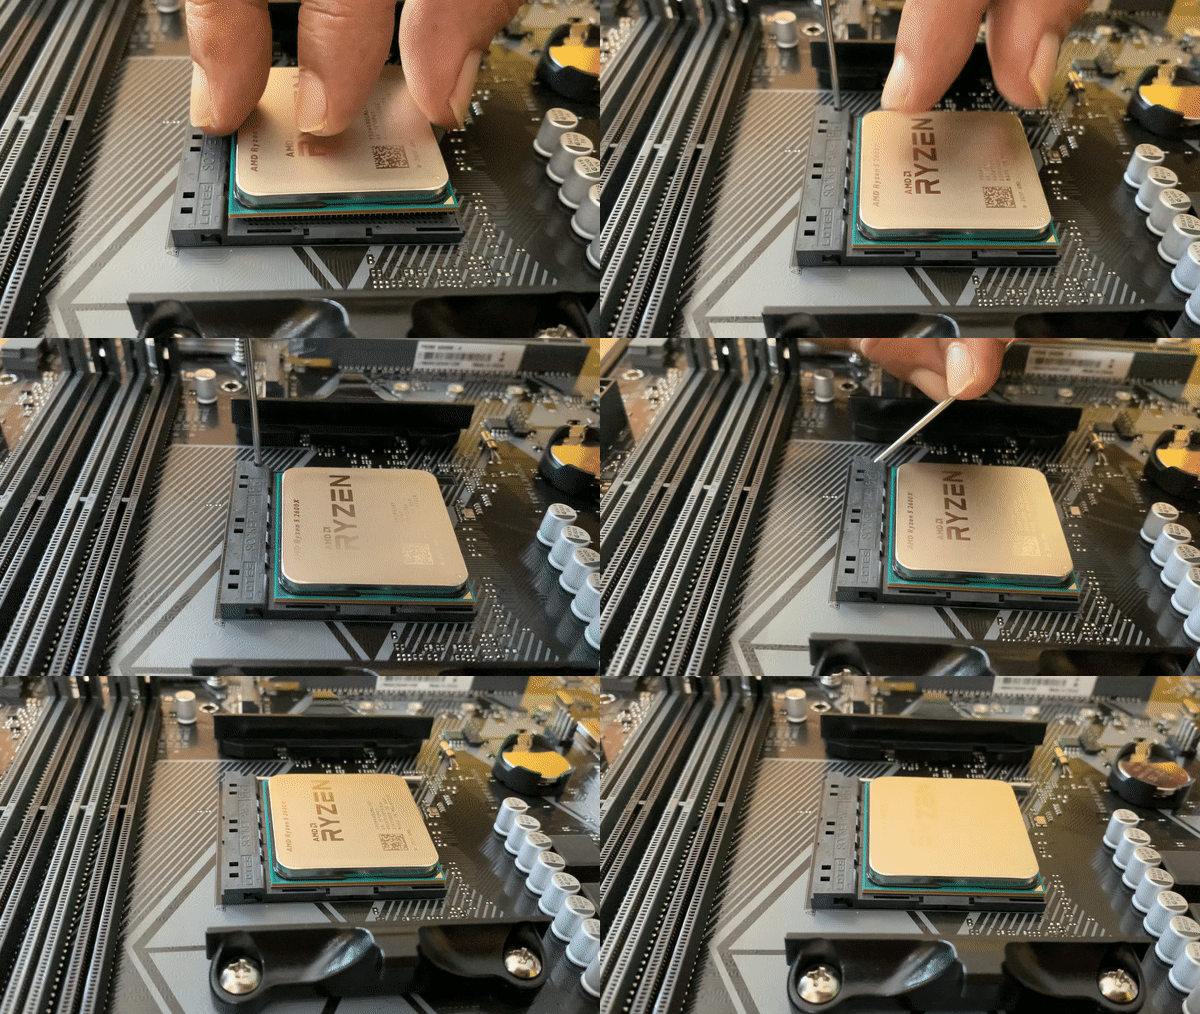
Analyzing the motherboard, you can see that the CPU socket is present in the middle of the motherboard. Now, installing the CPU is fairly simple, you will find a leaver present on the side of the CPU socket, lift it back gently.
Now you are ready to put the CPU in place. If you take a closer look at the CPU you will observe that has had one white or Golden Triangle in one of its sides now, take a look at the CPU socket carefully you will find a triangle on it as well. Align both the triangle on the CPU and the socket place the CPU firmly in place. There is no need to press very hard the CPU should be in place without the application of any force. You can try to wiggle the CPU from the top and if it stays firm and doesn’t move it means it is in place.
To fix the CPU in place, press the latch down the bottom. It might require a bit of force but don’t hesitate, it is fine. Once the latch is in place, your CPU installation is complete.
Step 2: Installing RAM
Next is the installation of the RAM sticks features frankly one of the easiest parts of the build.
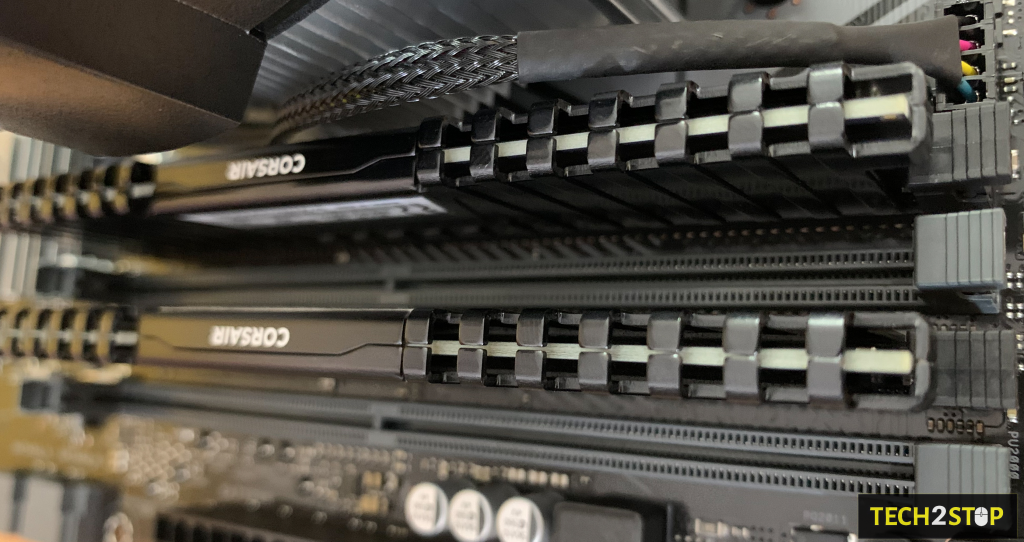
First off, you need to research if your RAM sticks have any sort of clearance issue with the air cooler (mostly is not an issue if you are not going with insanely huge air coolers). It is not a problem in most of the cases, but we advise you to research about it before making the purchase, and if you still aren’t sure and want to be extra sure that there is no problem you can go with low profile RAM sticks as well (we wouldn’t advise spending more for low profile sticks if not needed). Also, if you are using an AIO (All in one) liquid cooler, then it isn’t a problem.
Chances are you need to take advantage of dual-channel memory and even if you don’t want you really should because it provides extra performance at no extra cost.
If you are planning to not to populate all the RAM slots with RAM sticks (for example you are planning to populate 4 RAM slots on your motherboard with 2 RAM sticks, it won’t work if you are planning to use one stick of RAM on 4 or 2 RAM slots because you need 2 RAM sticks to use dual-channel memory) then you should look up the motherboard manual to see which two slots you need to populate to take advantage of dual-channel memory.
For those who are planning to populate all your RAM slots, there is no need to get through this step since you will be populating all the slots, including the ones which support dual-channel memory.
With that out of the way, we come to the installation of the RAM modules. You will find the RAM slots on the top right of most motherboards (the long slot), and to install the RAM just pull the latches on the RAM slots.
Now you will notice that the RAM has a notch that is slight of centered, now line up the notch of the RAM with the notch of the slot, and insert the RAM into the slot. You will hear a click sound which means that the Ram has been firmly secured into place.
Repeat this same process for the other RAM sticks as well to insert all your RAM sticks. We have now completed the installation of RAM.
Step 3: Installing the CPU Cooler
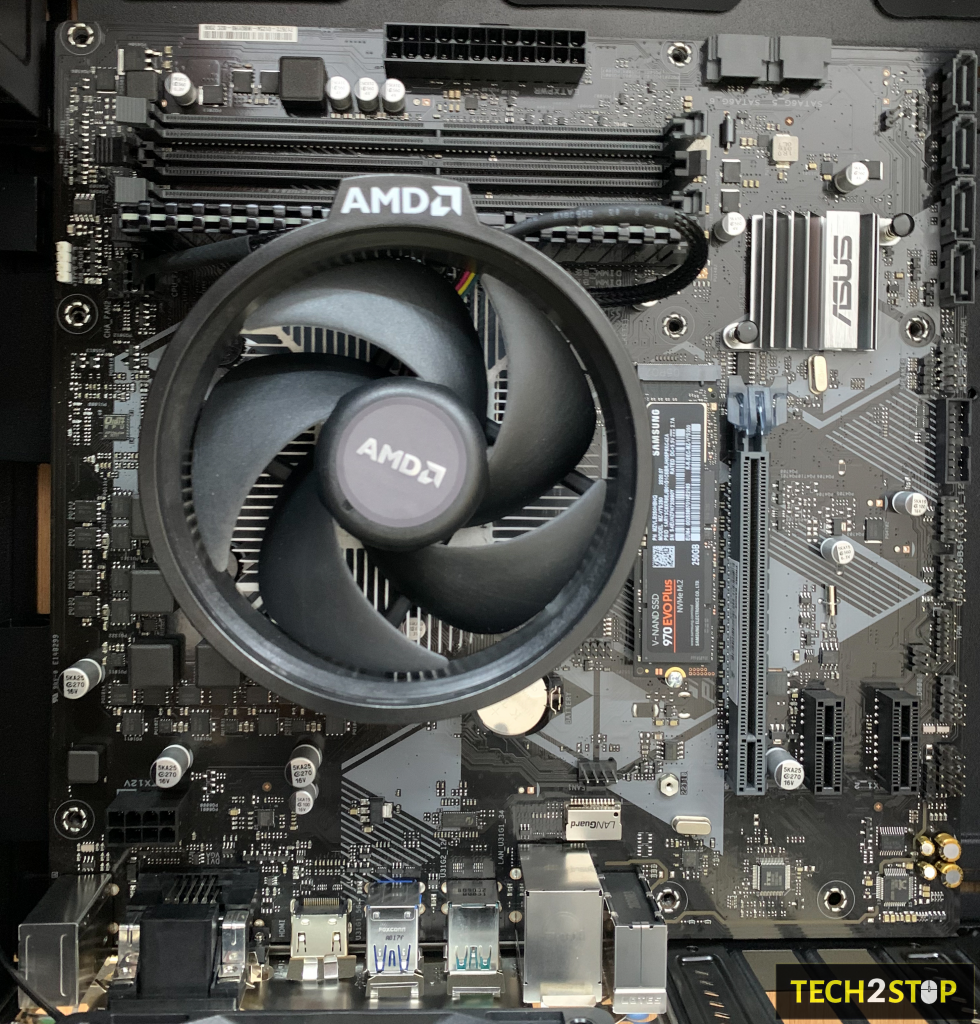
After this, we need to install the CPU cooler, but before going to the process, it is important to understand different CPU coolers in the market have different mounting brackets, and to know exactly how to install the CPU coolers reference the CPU cooler manual.
But all coolers have the same general steps however there is no standard mounting procedure as stated previously.
First and foremost, you need to apply some thermal paste before installing your CPU air or liquid cooler. You should first see if it comes with pre-applied thermal paste or not. Some coolers come with pre-applied thermal paste in that case you can skip this step.
If it doesn’t you need to add thermal paste, the best method to add thermal paste is not is to apply exactly enough amount to cover the heat spreader neither too much nor too low. You can apply thermal paste equivalent to the size grain of rice, which should be enough for most if not all AMD and Intel CPUs (mainstream consumer CPUs). If you feel like there isn’t enough thermal paste, don’t hesitate toad more because the less thermal paste is not desirable at all.
Now coming to the actual CPU cooler installation install the bracket for the CPU cooler first. As stated earlier different coolers come with different brackets and different mounting mechanism which is why you should refer to the manual to understand each and every process of how to install the cooler on top of the CPU.
After the installation of brackets is done its time for mounting the cooler on top of the brackets and tighten them up, tighten the cooler firmly (don’t over-tighten) so that a strong connection is established between the cooler and the CPU for maximum heat dispersion.
Step 4: Installing m.2 SSD
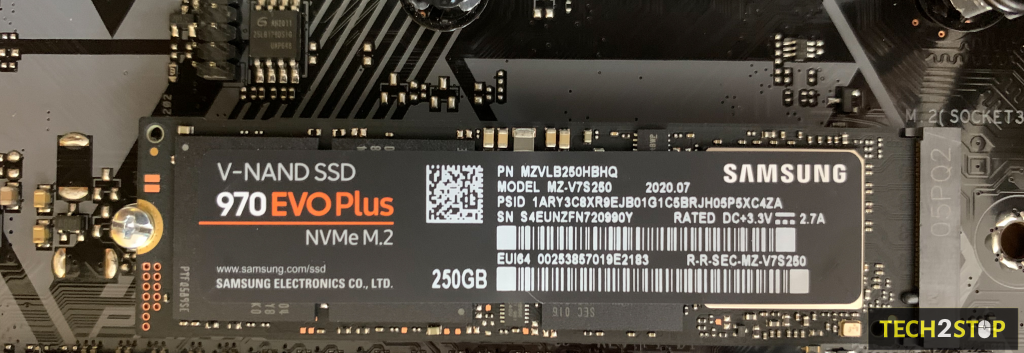
Next, we need to install m.2 SSD into the motherboard. Now you need to make sure that your motherboard has an m.2 slot before buying an m.2 SSD.
After you have confirmed that there is an m.2 slot, you can get the SSD out of the box and open the heat sink which covers the m.2 slot (some motherboard may not have this heat sink for the SSD slot so you can mount the SSD right away).
Now, for installing the SSD, you should take a look at the notched side of the SSD and line it up with the m.2 slot at a 30-degree angle and insert it. After inserting you need to hold the SSD flat to the motherboard, you will notice that there is a semi-circular hole at the end of the SSD which perfectly lines up which a hole for a screw in on the motherboard. All you need to do now is tighten the screw in place, and you have successfully installed your SSD.
At last, if you had a heat sink on the SSD slot, then you should put it back on the slot if not your SSD installation is complete.
With that, we have installed all we need on our motherboard.
Step 5: Installing Motherboard in the PC Cabinet
We now come to installing the motherboard into the PC case.
Before installing the motherboard, you need to open the back and front panel of the case (usually they are straightforward to remove since you need to undo only a few screws, for the exact information we recommend you consult the case manual). After removing the panels, you would find that the case has a bunch of accessories in it, keep it to the side these would be needed later.
Now, you can lay your case down on the table or any flat surface you are working on just for the ease of installation.
Next garb the motherboard Io shield which you unboxed from the motherboard and installed it in the IO shield cut-out. It is usually present in the top right corner of the PC towards the back, to install it just push it firmly into the cut-out until you hear a snap/click sound and repeat it all the corners of the IO shield.
Finally, we are ready to mount the motherboard to the case. Before installing the motherboard, you need to find see what size of motherboard it is ATX, Micro ATX, Mini ATX, etc.
Now, you need to take note of the motherboard standoffs are installed or not. Standoffs are small pegs that lift the motherboard from making direct contact with the case preventing any shortages of any sort.
To install the standoffs, open the accessories box provided in the case, you will find motherboard standoffs in it. According to the size of your motherboard find the appropriate spots where the standoffs need to be screwed in, for that you can consult the case manual and then screw the standoffs at the required holes.
Note: Some PC cases come with pre-installed standoffs, so those with pre-installed standoffs don’t need to worry about this process.
Next, you should take you motherboard and place it in the motherboard such that its rear ports align with the IO shield perfectly. Now, you need to tighten all the standoffs with the screws provided along with the case accessories.
After all the standoffs are screwed in the motherboard has been fixed into the PC. One thing to keep in mind is you should not overtighten the standoffs because it will destroy the threading on the standoffs.
Note: If you are planning to install an All-in-One (AIO) liquid cooler, it is a better idea to attach the radiator in the case before fixing the motherboard into it. That totally depends on the case and the water cooler you are using, for example, if the AIO cooler is very big and if it barely fits in the case then you should probably install the AIO radiator first.
Step 6: Installing the PSU
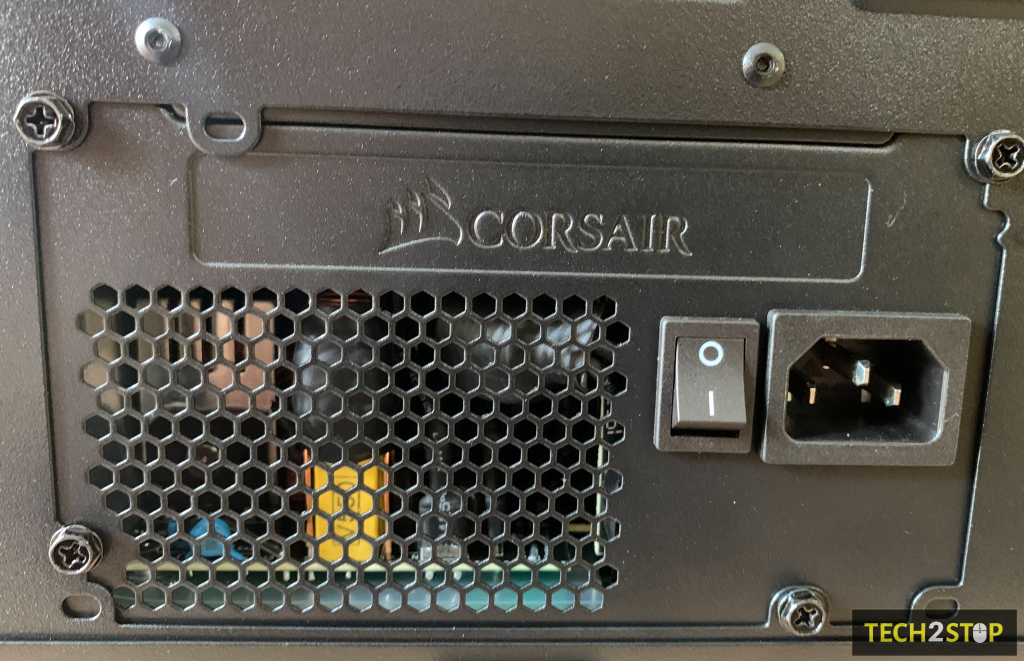
The power supply unit PSU is the most crucial part of your PC since supplies power to all our computer you. This one of the main reasons to buy good quality and efficient PSU.
PSU’s are of mostly three types based upon modularity: non-modular, semi-modular, and modular the only being that with non-modular ones the cables are permanently attached to the PSU while the modular ones don’t have any cable permanently attached with the PSU.
There is no need to worry as all of these provide the same exact functionality only difference being the modular ones are easier to cable manage.
We are going to talk about the semi-modular power supply since it would cover all the PC builders with different types of PSU. Semi-modular PSUs have essentials like the 24 pin ATX cable, power supply 8-pin EPS for the CPU, and 6/8/2*6/2*8 pin PCIe Express cable for the graphics card permanently attached to the PSU. All the other connectors like SATA and Molex connectors can be attached as per requirement.
Before installing the PSU, you need to decide on which side the PSU fan should face. Usually, It is faced towards the bottom since most cases these days come with ventilation at the bottom along with dust filters.
Note: If there is no ventilation at the bottom, in that case, you can face the PSU upwards.
Now we need to attach all the required cables in the Semi-modular PSU like the SATA power connector, and we are ready to mount it into our case.
Align the screw holes on the back of the case with the PSU and screw the PSU in place while holding it firmly in its position. It is important not to overtighten the screws rather have them firm.
Step 7: Connecting the front panel connectors

Let us now connect the front panel connectors, which are the cables coming out of the front of the case. These include power, restart button connector, USB 2.0, USB 3.0 connector, 3.5mm audio jack connector etc. All of these connectors are connected to the motherboard.
Before you connect front panel connectors to the motherboard, you need to locate where all the cable connectors are located on your motherboard.
If you aren’t able to figure out where to connect the front panel connectors on the motherboard, then you should refer to your motherboard manual for that. The connectors are usually labeled on the motherboard, but the labeling differs for different motherboards. Thus it is best you consult your motherboard manual.
After you have located where the connectors go try to route the cables such that try to route cables in such a way that the distance it has to cover through the hole to the connector is the is minimum. Make sure that there are no loose cables hanging around, which looks ugly.
Now you can connect the cables to the respective connectors just make sure that you don’t force the wires too much since it can damage or even break the connectors.
Note: The USB 3.0 is a big connector which needs a bit of force to secure it in place, but makes sure to line up the connector first before you force it in.
Step 8: Installing additional Fans
You might want to add additional fans on your case for increased airflow and better thermals and performance.
At first, you need to decide where you want to mount your fans and make sure that there are both exhausts as well as intake fans. Depending upon the case, there are several mounts to fix your fans at different positions. Check your case manual to see where the braces are positioned.
Now that you have decided where to mount your fans, you can take a screw available in the case accessories box to screw in the fans tightly. After that, all that is left to do is plug in the fan connectors to the motherboard.
There are several fan headers present on every motherboard to which you can attach the fan connectors. Make sure to be gentle with these headers since applying a lot of force may damage the headers. If you don’t have enough fan headers on your motherboard, then you can use fan splitters which lets you connect two fans to one header. Moreover, try to route the cables in such a way that they are not very easily visible from the front.
Note: If you have RGB fans they have additional connectors to power the RGB. You need to connect these RGB connectors to the RGB headers present on the motherboard. Check the motherboard manual to know where all the RGB headers are present on the motherboard. If you don’t have enough RGB headers, you can use splitters or RGB controllers (for a large number of fans) available in the market. The RGB controller acts as a hub to which all the fan and RGB header is plugged in, and it ultimately connects to the motherboard via USB 2.0 cable.
Step 9: Installing SSD/HDD
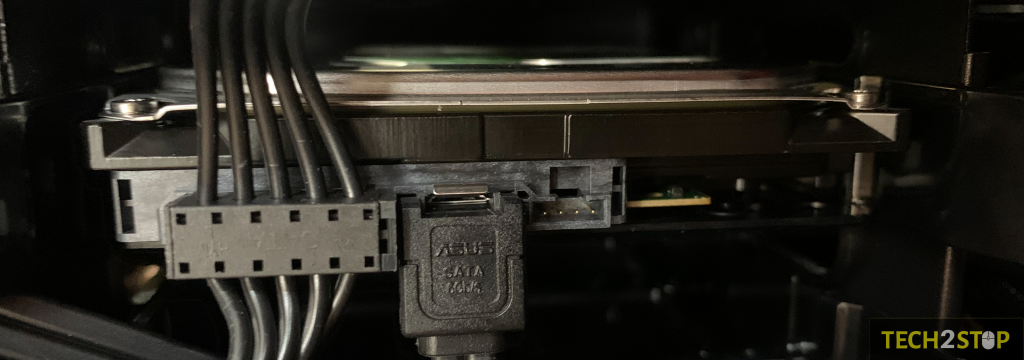
Setting up storage (SSD/HDD) is very important, that is what we are going to do next.
At first take a look at where you want to mount your hard drive and SSD, especially in the case of HDDs you should place it in the 3.5-inch bay or a drive cage and screw it in tightly since HDDs have moving parts which can get damaged if not secured firmly.
There are several 2.5-inch bays in most of the cases nowadays, and you can mount your SSD in any of these bays.
Line up the HDD or SSD with holes present on the drive bay and screw into them using appropriate screws from the case accessories.
After fitting the SSD/HDD in place, you need to connect it to the motherboard. Connect the SATA cable to the back of the HDD/SSD and then connect the same cable to the SATA port in the motherboard. Consult your motherboard manual to find the exact location of the SAT ports on your motherboard.
Note: You should prefer to connect your storage to the first SATA port as it will give the maximum bandwidth for your storage.
Next, you need to connect your storage to the PSU. Most modern PSUs have SATA power connectors which plugin directly into the SATA power connector. You just need to take the SATA power connector from the PSU and plug it in the power port of the SSD/HDD.
If your PSU doesn’t have a SATA power connector but Molex connectors then we need Moles to SATA adapter and connect it to the SSD/HDD.
Step 10: Installing the GPU
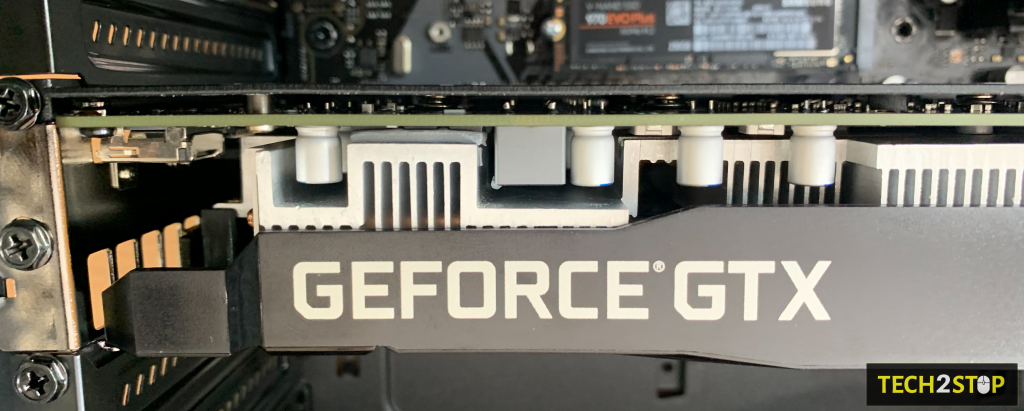
The final component to add in our system is the GPU. Installing the GPU is simply one of the easiest and most satisfying tasks of building a PC.
First, select the PCIe slot with the highest bandwidth available. For most of the motherboards, the topmost slot has full bandwidth. Again, check your motherboard manual for all the details.
After you have found the PCIe slot with the highest bandwidth, remove the metal brackets (expansion slots) to the left.
The number of expansion slots you need to remove depends on the size of your GPU. For example, GPUs with 1 or 1.5 slot size need 1 slot to be removed, and GPUs with 2/2.25/2.5/2.75 need 2 slots to be removed.
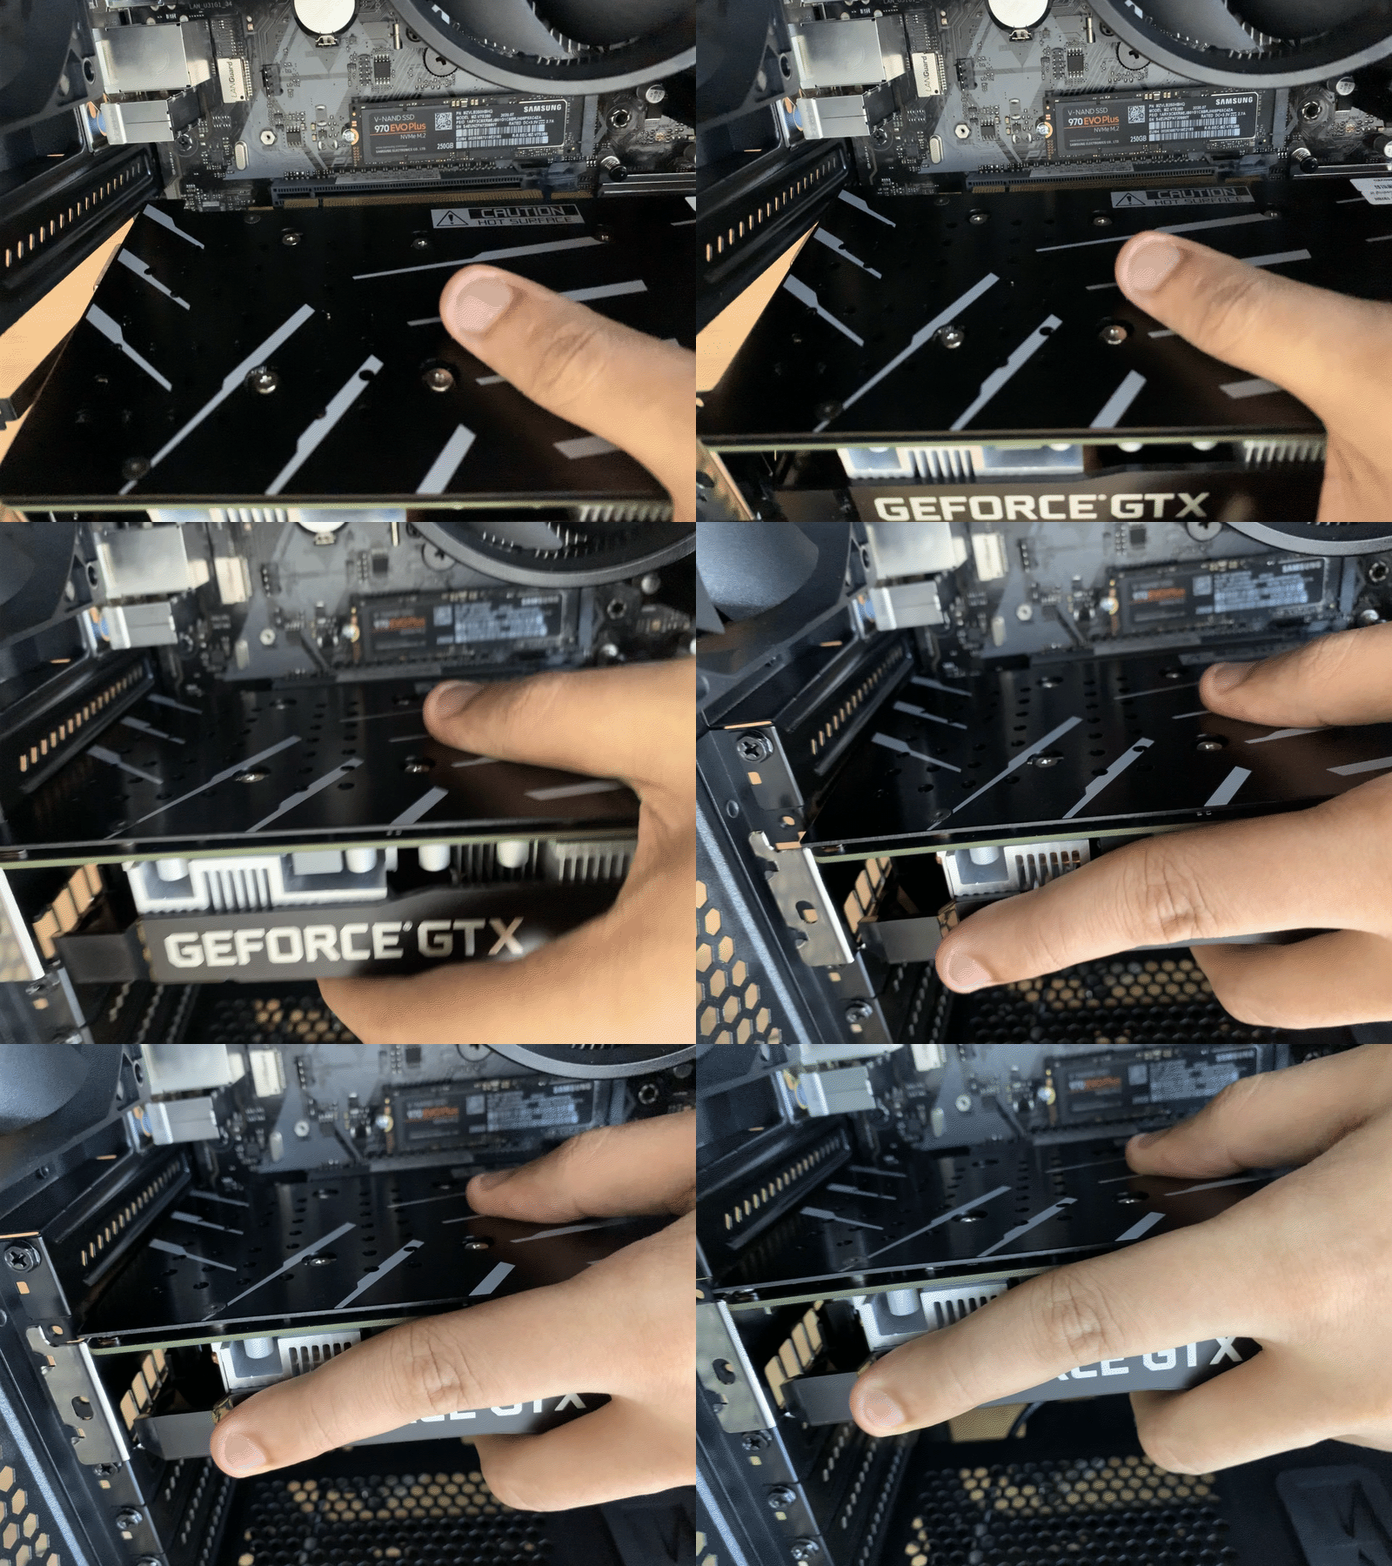
After removing the required number of expansion slots from your system, you can unclip the retention arm on the PCIe slot.
Now unbox your GPU and hold it by the metal region and remove any cover on the bottom part of the GPU (the area where the GPU makes contact with the motherboard) if your card has one.
Next, you should lower the GPU in the case and align the GPU with the PCIe slot and insert the bottom part into the motherboard, then press it gently until it attached securely in place.
Finally, you need to lock back the retention lock in place.
Note: In several motherboards, the retention arm automatically locks when GPU is installed.
See if the Rear IO of the GPU is lined up, and then screw the GPU with the same screws that you unscrewed to take of the expansion slots. You have now successfully installed your GPU in your PC.
Step 11: Connecting all PSU cables
Finally, we need to wire the PSU cables into the right locations in the motherboard.
If you have a modular or semi-modular PSU (PSU with detachable cables allowing you to connect only the cables you need) connect all the cables you are going to need for your PC. For example, 24 pin ATX, 8 pin EPS, PCIe power, SATA Power, etc.
Note: We recommend you attach these cables before you attach the PSU into the case because it often becomes very difficult to attach cables after the PSU is physically installed.
There is a 24 pin ATX power that goes into the 24-pin socket on the right of the motherboard (most of the time). If you are having trouble finding the 24-pin socket on your motherboard, then you can consult your motherboard manual. Align the pins the correct way, and plug in the 24-pin connector firmly. You should give it a slight push in to make sure it’s secure in its place and won’t come loose in the future.
There is also the 8 pin EPS power connector which powers the CPU. It is usually located in the top left part of the motherboard above the CPU socket. But if you are having trouble locating the 8-pin socket on your motherboard, then you can consult your motherboard manual. Align the pins the correct way, and plug in the 8-pin EPS connector firmly. You should give it a slight push in to make sure it’s secure in its place and won’t come loose in the future.
On your GPU you also have the PCIe power connections, and you need to connect the PCIe connector to the GPU to power the GPU. It can be a 6/8/2*6/2*8 pin configuration depending on the GPU. Align the pins the correct way, and plug in the 24-pin connector firmly. You should give it a slight push in to make sure it’s secure in its place and won’t come loose in the future.
Next, you need to connect your storage to the PSU. Most modern PSUs have SATA power connectors that plugin directly into the SATA power connector. You just need to take the SATA power connector from the PSU and plug it in the power port of the SSD/HDD. If your PSU doesn’t have a SATA power connector but Molex connectors then we need Moles to SATA adapter and connect it to the SSD/HDD.
Note: We recommend that you try to thread PSU cables to all the components through the cable holes available in your case.
Now you just need to close of you can close off the front and back panels and your build is complete.
Conclusion
Now that your PC build is complete, you install your operating system of choice and install all the software’s you need and enjoy your build.
Here’s a Bitwit Video that you can watch as well.
Also Read | Everything to know about FAU-G | PUBG Mobile Indian Alternative
FAQ
Is Building a PC expensive?
Which is a better choice SSD or HDD?
SSDs are much faster than HDDs in terms of sequential read and write speeds. That is why SSD reduce load times of apps and makes the experience much snappier.
SSDs also don’t have any moving parts like HDDs, which means they are much less prone to stop working.
Since 2019, SSD prices have significantly reduced. Nowadays a decent 500 GB SATA SSD costs close to a 1 TB HDD.
HDDs are still the best option if you need lots of storage, but we would recommend to get a small SSD for the OS and frequently used apps and HDD for the large files.
What is Hyperthreading or SMT (Simultaneous Multi-Threading)?
What does the 80+ certification on a PSU signify?
What is Dual-Channel memory?
Why should you build a PC?
You can build a PC at a much lower price when compared to buying the same PC with the same specs.
Building a PC is very simple; anyone can do it and thus save some money by not going for a pre-built PC.
You can customise your PC the way you want it.
You will learn the technicalities of a PC while building it.
If you are confused if you want to get a laptop or a PC, then the most important question one must ask is whether you are planning to use it outdoors. If the answer is yes, then you need a laptop. And if you don’t then build a PC, it is your best bet since you can get much better specs for a lesser price compared to a laptop. Moreover, you can upgrade it down the line and customise it to your liking.

